[Hint: Click on right side of strip to see all three frames.]
1. Consider your stash of thrifted, recycled, ready-for-a-new-life materials. Notice your favourite thrifted flannelette duvet cover (surely once the property of psychology major from this one-horse university town, who, whilst on a student budget, fancied themselves an early minimalist - classy soft greys with the occassional tasteful fawn and cream stripe). This will make a great, neutral sea for the fish-to-be.

2. Pull out that lovely, thrifted, cotton printed blouse. (Almost certainly donated by a fondly reminiscing Maritimer whose once-in-a-lifetime trip to Bali gave them the very excuse to wear this pretty, light cotton top - although its soft drape never quite felt the same back on Atlantic Canadian soil.) The pattern and hue of this blouse just seem to shout "fish!"

3. Remember your stash of brightly and oddly coloured, thrifted (and now felted) woolen sweaters. Seek every opportunity to work them into what you are working on.

4. Let free your imagination and your primary school drawing skills. Draft onto some solid paper some simple patterns of whatever quirky shapes take your fancy. Cut them out.

5. Pin patterns to your colourful material, and then cut out leaving about 1/4 of an inch of extra material all the way around. (You can either eyeball this yourself or, if you don't trust your eyeballs, you can cut out two paper patterns: one the larger size with the extra 1/4 inch all around and one the original size and shape.) [See photo in no. 7 below.]
6. Trace your pattern onto some fusible interfacing (lighter) or fusible backing (heavier) (whatever level of support you think you'll need to carry out your plan) and then cut out.

7. Iron your cut-out fusible material onto the wrong side of your cut-out colourful material (matching the correct shapes, of course!) Notice that your pretty material should extend 1/4 inch beyond the fusible backing. With sharp scissors, snip around your border material, at regular intervals, up to the edge of the fusible material. Fold border over the edge of the fusible backing and iron down. You should now have some lovely shapes, the size you want them, complete with inner fortitude (provided by the fusible backing, of course). You are now ready to sew them onto your chosen embroidery backing material, which you have cut out and mounted onto an embroidery hoop.


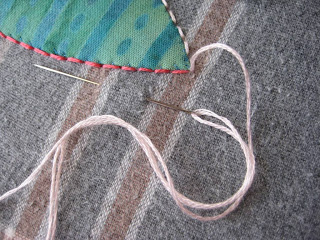
8. Use a small whip stitch in a colour that suits your project (either matching or contrasting appropriately) to secure the shape to your backing fabric. I used a very fine metallic blue thread to anchor my fish to their grey stripey sea. [No photo for this one, sorry. I was so intent on sewing I forgot to photograph each stage.]
9. Once sewn where you like, embellish with your favourite embroidery stitches. Go wild, experiment. I used a simple running stitch to outline each fish and to provide detail to their patterns.


I also used french knots for flowers and eyes, and alternated stem and split stitches for other features such as the teapot handle etc.

10. Then mount them firmly in suitably sized embroidery hoops, cut off excess material carefully, give them a smile of appreciation and welcome them into the world as the full creative beings they are.
Feel free to ask me any questions if I haven't been clear enough in these instructions.
How brilliant! Good luck in the competition....
ReplyDeleteLet me just check my stash of felted sweaters, old blankies and maritime shirts.... wink wink.
How lovely! I've only just discovered your blog tonight and I do like your style of writing - very jolly ;-) And I love your fish - I have been having a bit of fun with embroidery hoops recently - and applique with wool, embroidery and buttons is my favourite thing to do! p.s. I knew about the April 1 tradition - my daughter learnt about it in French class and they all spent the day making paper fish and trying to attach them to their friends in the playground.
ReplyDelete